
One of the many advantages of learning to animate in Maya is the wide range of free plugins developed by the user community around the world. A free plugin is just that - a piece of code that can be added to your copy of Maya, free of charge. One of the most useful is the tweenMachine, created by Justin Animator, which helps animators to create breakdown poses in Maya on stepped curves. It's a time saving tool that takes much of the labour out of breaking down your character poses once you are happy with the timing of the main blocking of your animation.
What is the tweenMachine?
The tweenMachine is a free Maya plugin designed to simplify the process of creating breakdown poses between your key poses.
How do you download the tweenMachine plugin?
You can find the free plugin here: http://www.creativecrash.com/maya/script/tweenmachine
Who created it?
The tweenMachine was created by Justin Barrett.
How do you install it?
The tweenMachin comes with a Read Me file, which you should definitely read.
To install the tween Machine, first find this zipped file: tweenMachine.zip
Open it up and you will find inside these files
tweenMachine.xpm
tweenMachine.mel
xml_lib.mel
 |
| type tweenMachine; in the Script Editor |
- Copy the two .mel files into your scripts folder in the version of Maya you are currently running. The path should look something like this: username/myDocuments/maya/2014/scripts
- Once you have copied the files into your Maya scripts folder, open Maya.
- Now open up the script editor (bottom right hand corner of yr screen) and type this (see image above) in the MEL (not Python) command line: tweenMachine;
- This should now launch the tween machine. If it doesn't, you have done something wrong. Start again!
- Now, in the script editor, copy the command, and go to file/save to shelf tab, and create a new shelf tab. Or, just copy the command and drag it into your shelf using the middle mouse button. You will get the same result.
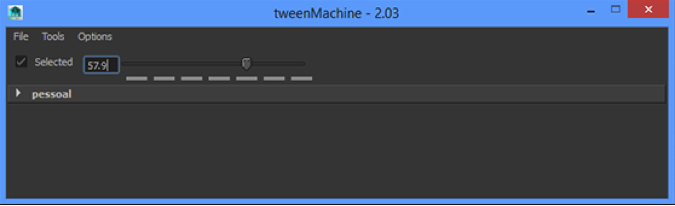
- Name the shelf tween, or TWN, or something like that. Now, by clicking on the shelf tab, you can use the tweenMachine any time you like. Click on the shelf tab to activate the tweenMachine. A pop-up slider should appear:
How do you test it out?
To test the tweenMachine, first create some break down poses on a simple moving object, such as a sphere.
- Create a sphere. Create/polygon primitives/sphere.
- Move the sphere to one end of the grid, and set a keyframe on it
- Click on the preferences tab in Maya, and set your animation curves to stepped curves, not spline.
- Back in your timeline, go to frame 25. In the viewport, move the sphere to the other end of the grid, and set a key frame. Press play. You should now see the sphere move, but in a very staccato fashion.
- Go to frame 13 in your time line. Set a keyframe on the sphere, and click on the tweenMachine button. Use the slider on the tweenMachine to adjust the position of the breakdown pose. The slider allows you to favour one key pose over another.
Ok, got it. Now, how do I use it for proper animation?
Now use the tweenMachine to create break down poses on a complex human biped.

- Import a human biped, such as the Morpheus or Max rig.
- Create two poses, one at frame 1, and a second at frame 25, following the thumbnails above.
- Now select all the controls, and set a keyframe at frame 13. Click on the tweenMachine tab, and use the slider to adjust the spacing of the breakdown position.
- Once you have done your pose at frame 13, go ahead and add breakdown poses at frame 5, 9, 17 and 21, using the tweenMachine.
In conclusion:
What the tweenMachine does is allow you to set breakdown positions on all the control curves, without having to manipulate individual controls one by one. It saves a huge amount of time on production.
And if you are having trouble installing it, try watching this video below:
---Alex
For more on the experience of studying at Bucks New University, come and visit us at one of our Open Days, take a virtual tour of one of our animation studios, check out what our students think of our course, and see why we're ranked in the top 12 creative universities in the UK. Find out why we're giving free laptops to all our students, and why we give all our students free access to videos at Lynda.com. Also, see what financial assistance might be available to you. Learn which is better for animation, a PC or a Mac? Get hold of a copy of a map so you can find your way around campus, and learn about motion capture at Bucks.
No comments:
Post a Comment